
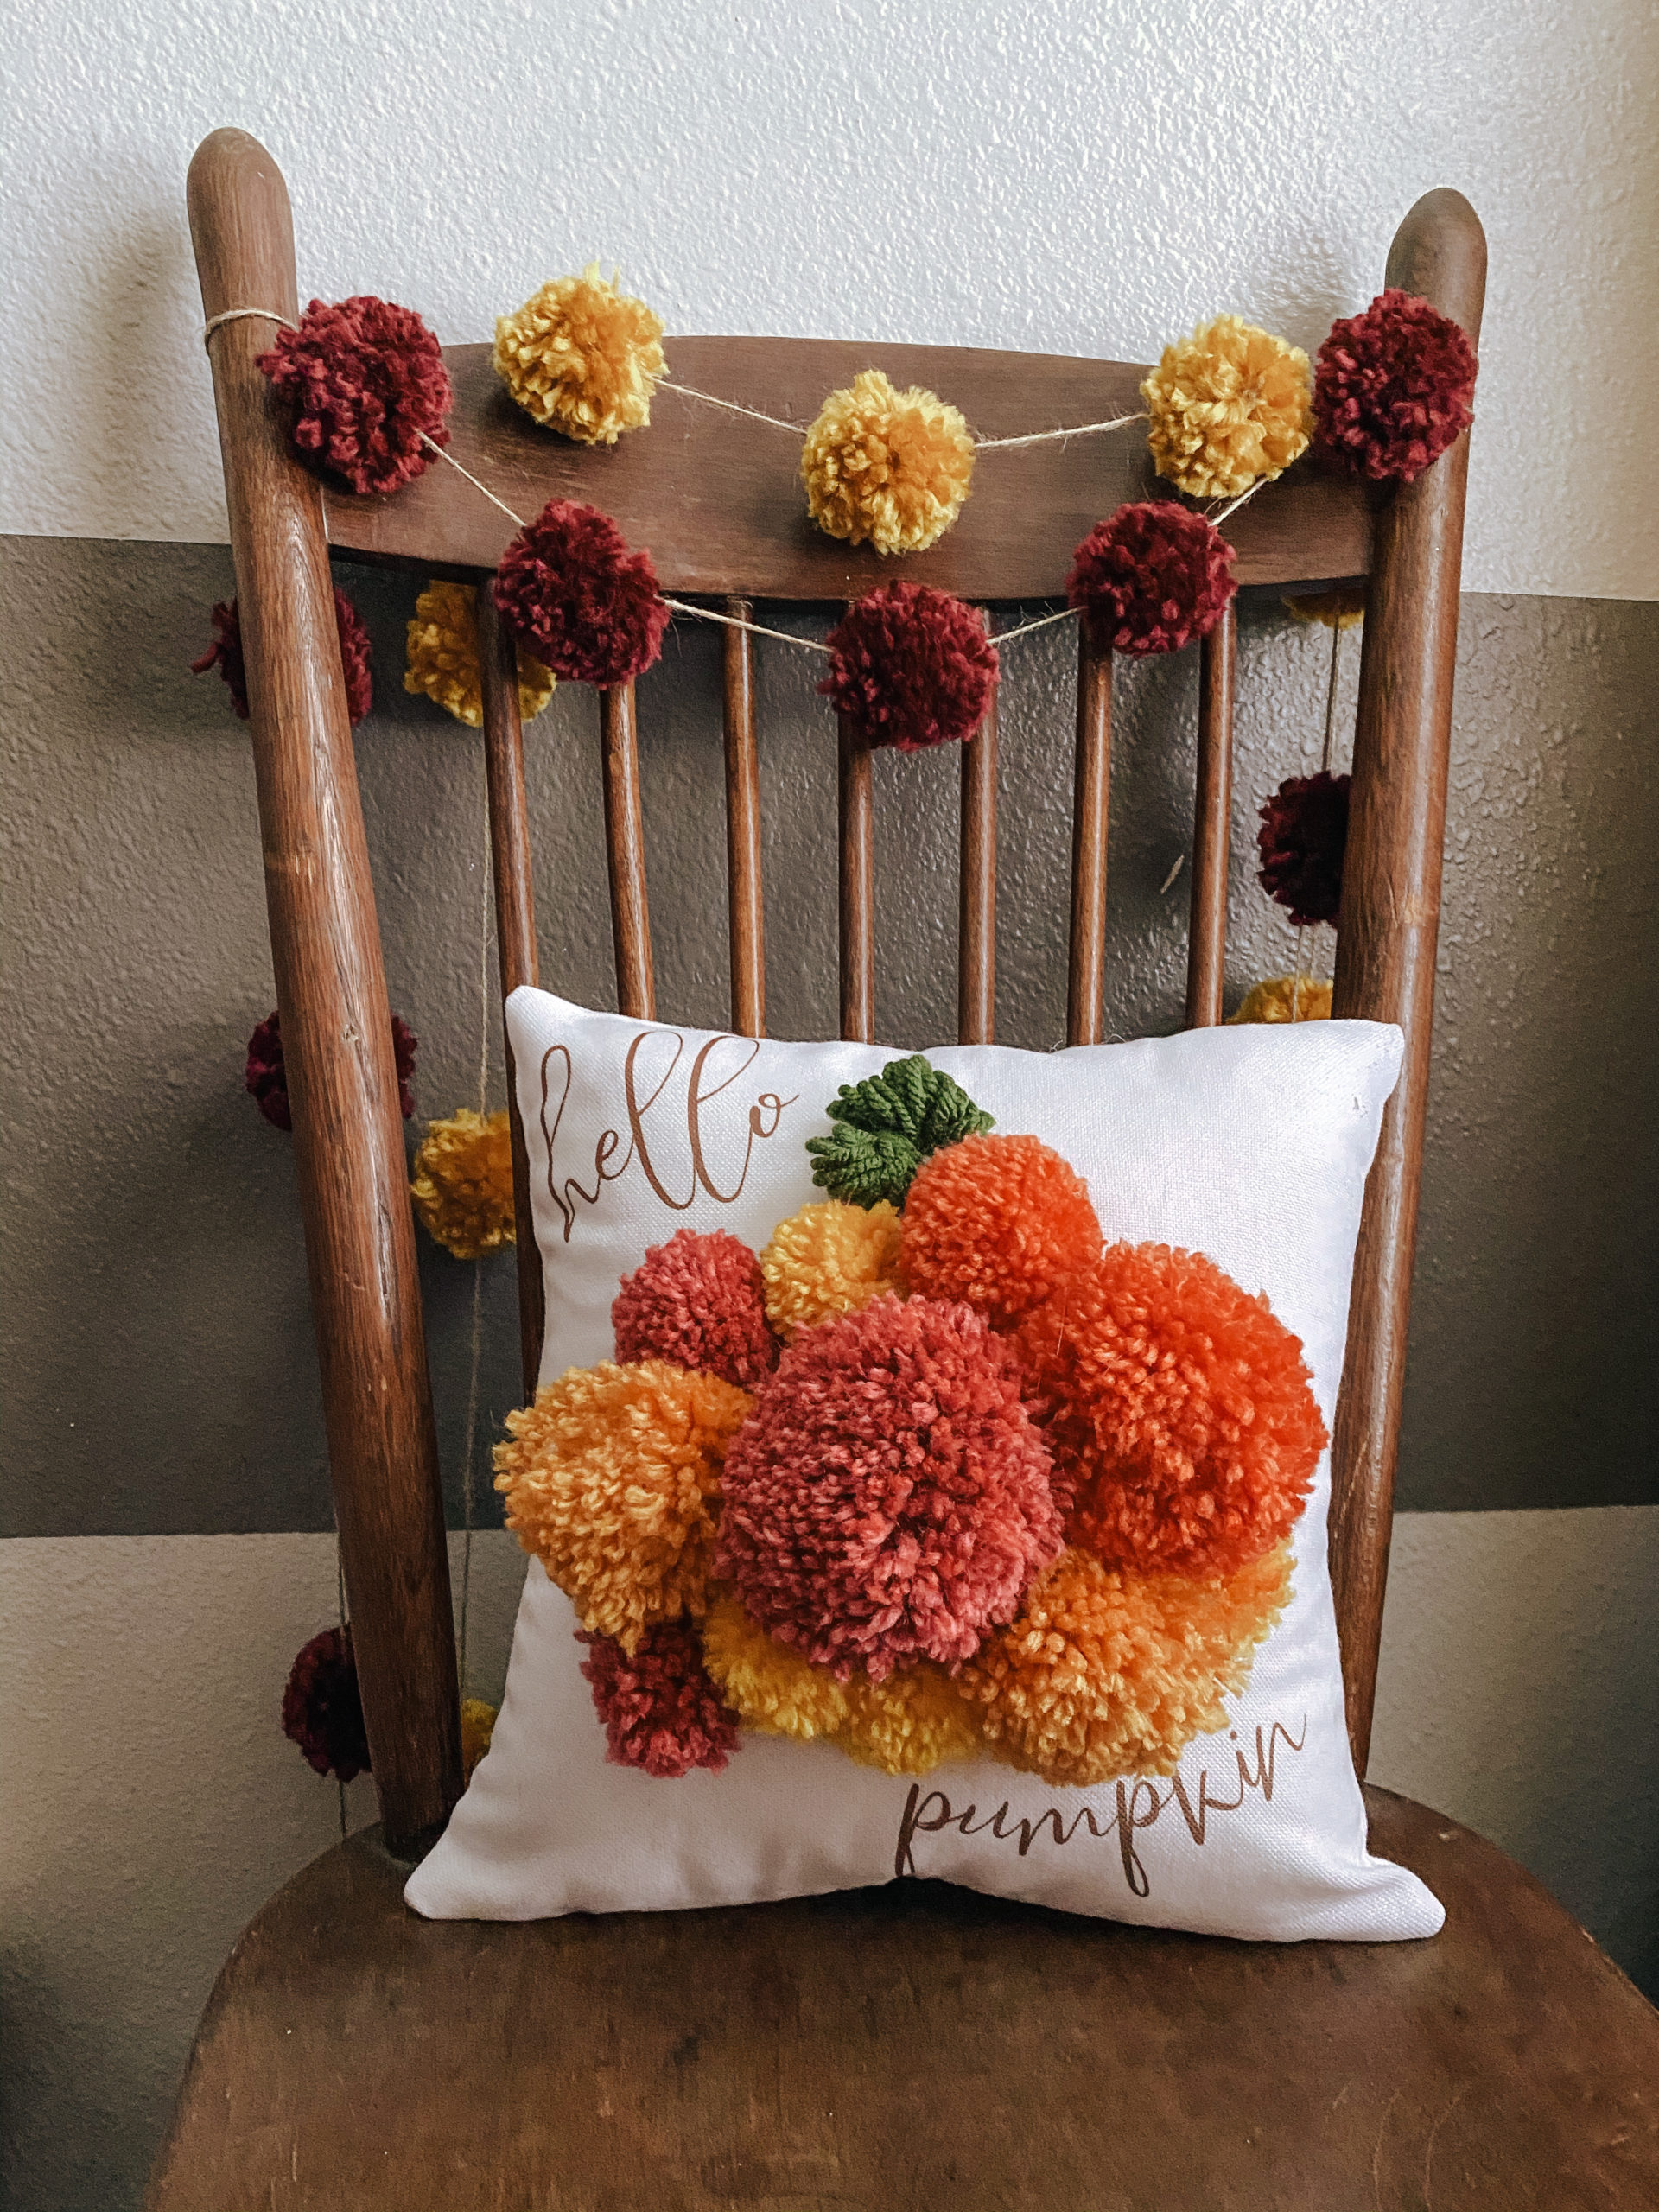
A little bit of this and a little bit of that with a whole lot of Fall
Fall is almost here and I’m so excited that I have finally found some crafts that I love to do. Finding something that I’m passionate about has honestly changed so much for me, but that’s for another day and another blog lol. Let’s talk about how you can make this fun Fall decorative pillow for your home.
For this pillow you will need:
- Cricut Maker
- Cricut Infusible Ink
- Cricut Easy Press
- 12×12 white pillow case
- 10-12 assorted poms in various colors
- Green bow made with yarn
- Yarn needle
How to add the Hello Pumpkin
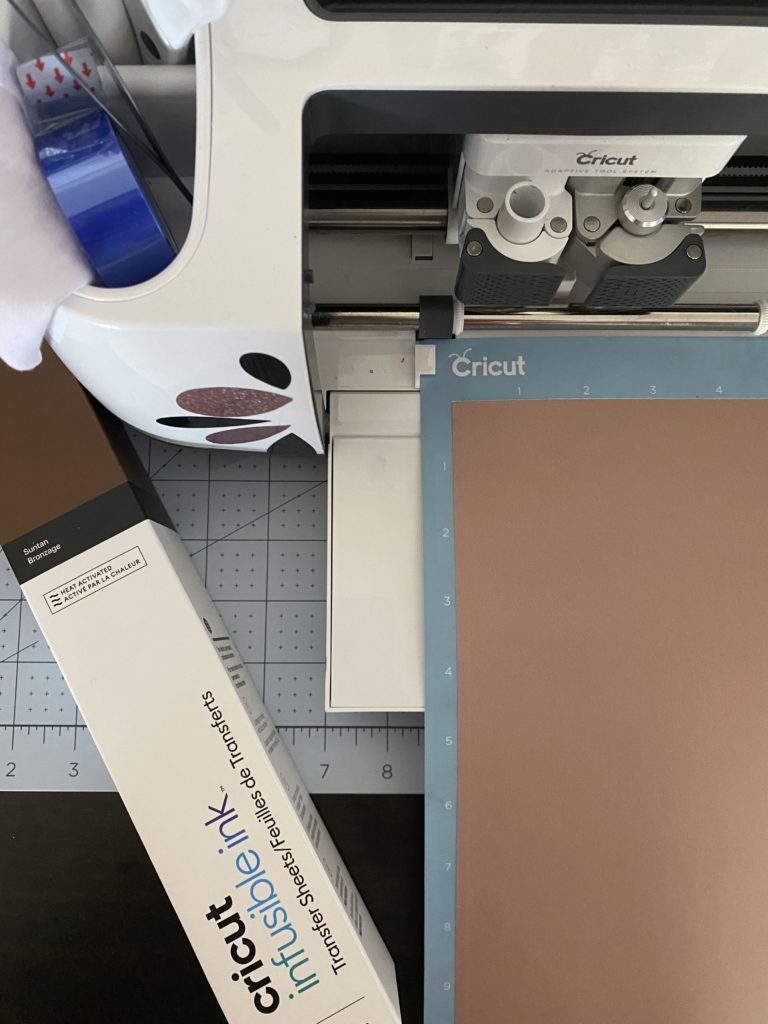
For this simple project you will need your Cricut Maker, infusible ink of choice, I did brown, Cricut Easy Press, this Design Studio File and a 12×12 pillow case.
- Start by opening the Design Studio File and turning on your Maker
- Load your Infusible Ink and follow the prompts in the Design Studio App
- If you are using a pillow case bigger than the 12×12 adjust to fit your pillow
- Once you load your sheet follow the prompt to make the design
- The instructions will go like this
- Load sheet
- Select material
- MAKE SURE TO MIRROR THE IMAGE!
- Cut file
- Unload sheet
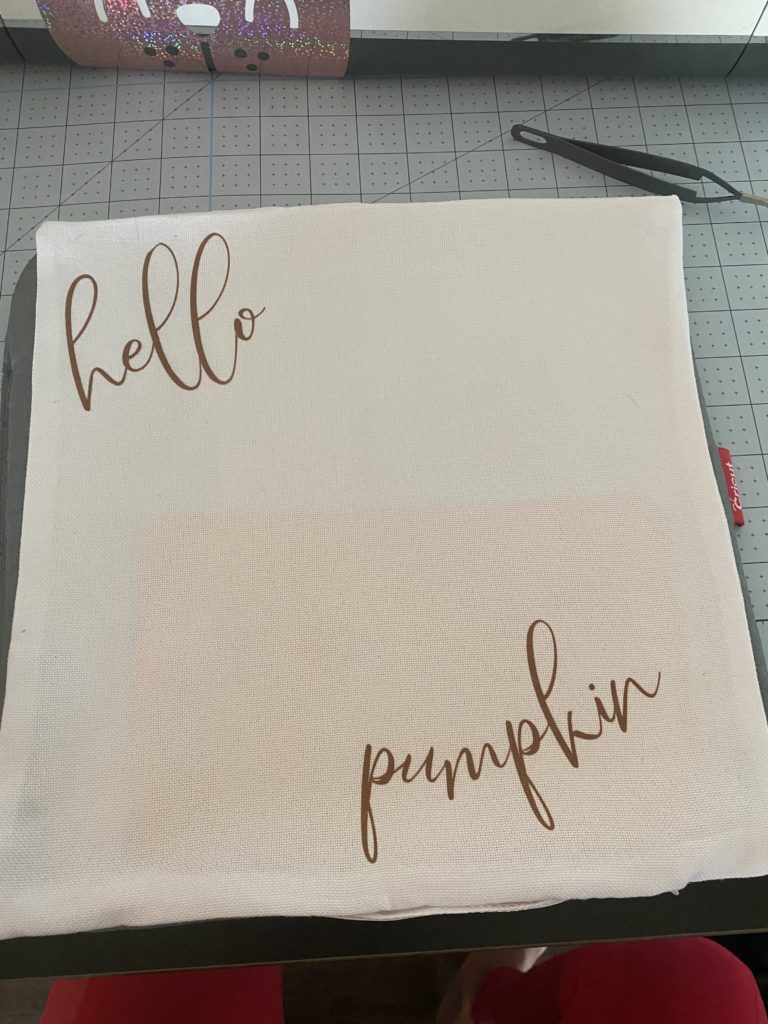
- Once you have the sheet unloaded cut off the access material and store back in original box.
- Weed the remained areas
- Turn on your Easy Press to the recommend heat using the Cricut Heat Guide that you can find here- Heat Guide. This is what it should look like for you depending on your iron you are using.
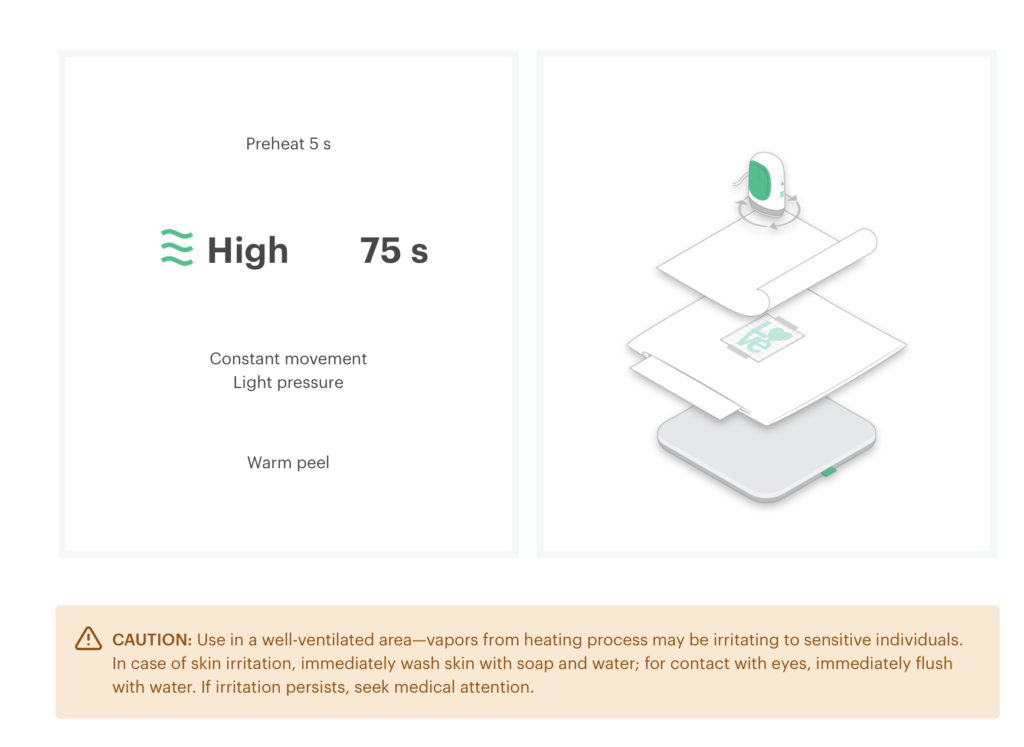
- When using Infusible Ink be sure to remember to use the provided parchment paper and if using a mini press to work in small areas to prevent from moving the sheet. Using heat tape can also help.
- Apply Infusible ink and allow to cool before the next step
How to add the Pumpkin Poms Poms
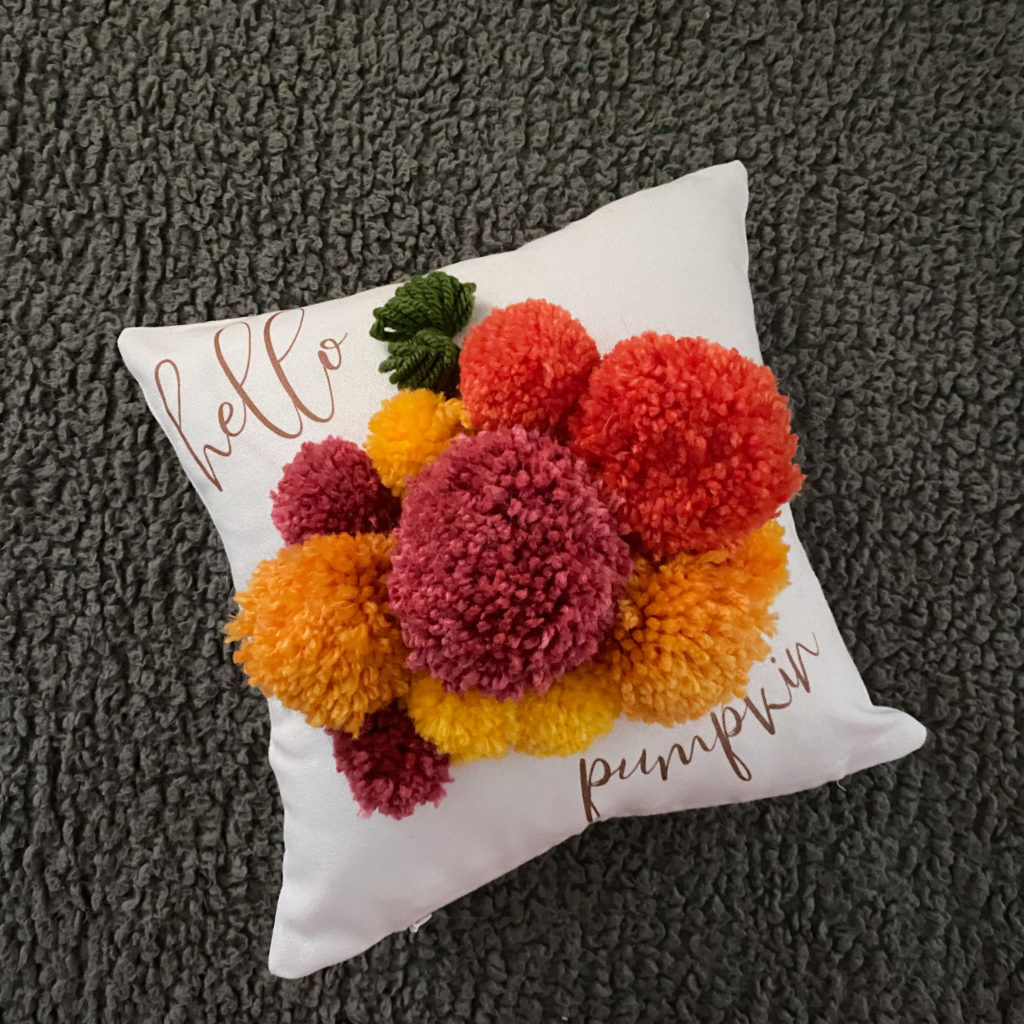
For this part you will get to choose your color of choice and how many you use. Bit for a reference I suggest 10-12 poms all ranging from 1, 1 ½, and 2 inches for a good variety. If you don’t know how to make pom poms check back next week and look for the How To Make Pom Poms.
Once you have your poms laid out how you would like to arrange them on the pillow case sow them one at a time. Tie a double knot behind for each tread and once’s done connect one thread from on to another next to it. You should end up with each Pom having 2 strings that each connect to another one near it so that little hands can not pull them through.
Once you do that stuff your pillow and your done!
For some for decor inspiration, head over to these pages and check out what they are sharing!
@kaysdailyinsight // www.kaysdailyinsight.com
@carly.esquerra // www.carlylifeandstyle.com
@blessedwithtwins // www.doublethedoubles.wpcomstaging.com

Gratitude yummi.club


I love this, I don’t have a cricut put I can def still do the pompom look!
I’m going to save this for later so I can try this! I haven’t tried the cricut infusible ink before so thanks for the tips!
This is such a cute idea! Decorative pillows can be so expensive to buy so creating something like this is awesome! Definitely going to try it out.
I’m still learning from you, but I’m trying to reach my goals. I definitely love reading all that is written on your blog.Keep the aarticles coming. I enjoyed it!