
Interchangeable Monthly Calendar

There’s been a lot of things that have changed lately, and for the most part I think we can all agree that it has changed our lives someway or another. For me it’s definitely shaken our tree. But I have to be honest, I miss my thrifty days the most. I am definitely one of those thrifting type of gals. I love to search for the diamond in the rough. You can honestly find some of the coolest things if you really have an eye for it.
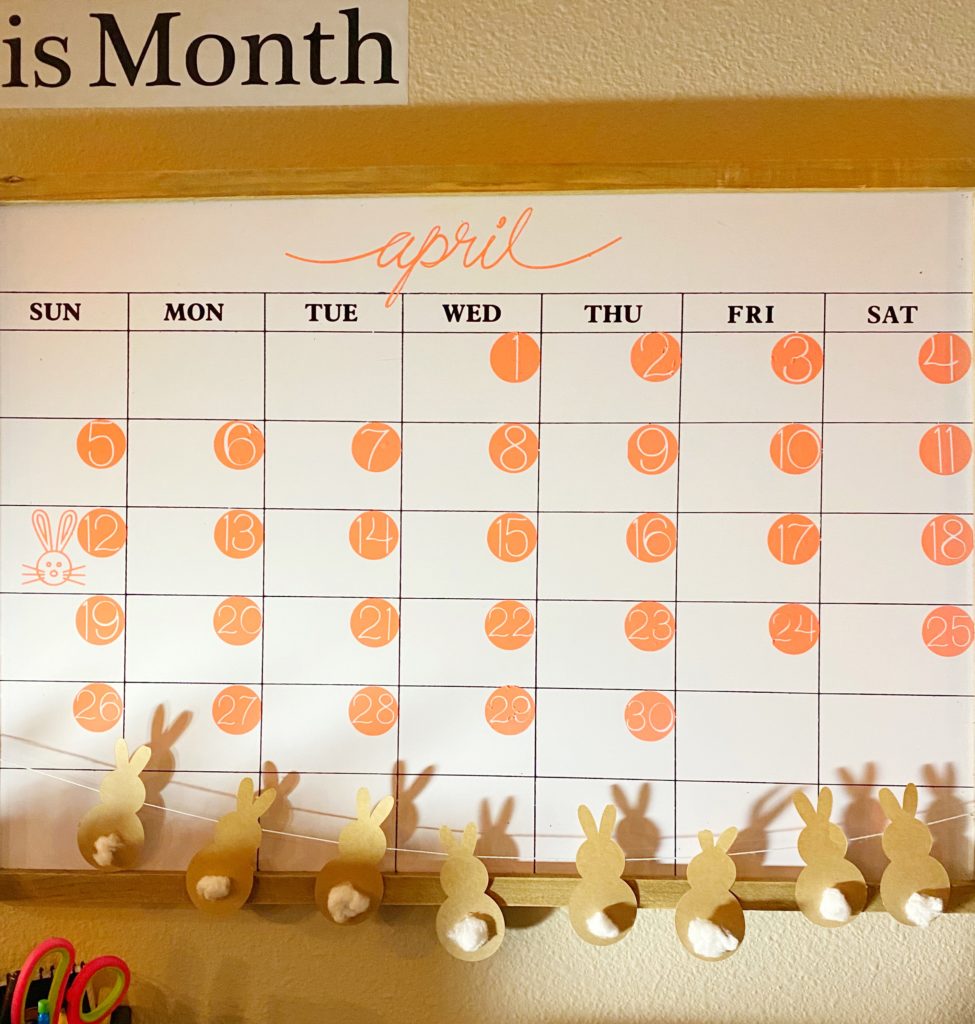
Take this awesome dry erase calendar. I found this board at our local goodwill, brand new with the Hobby Lobby tags of $36 still attached. My price: $5. If that doesn’t excite you I honestly feel like you may be missing out in life because a savings like that is amazing in my rule book. Any who, thanks to this amazing find I can present to you my- DIY Monthly Calendar.
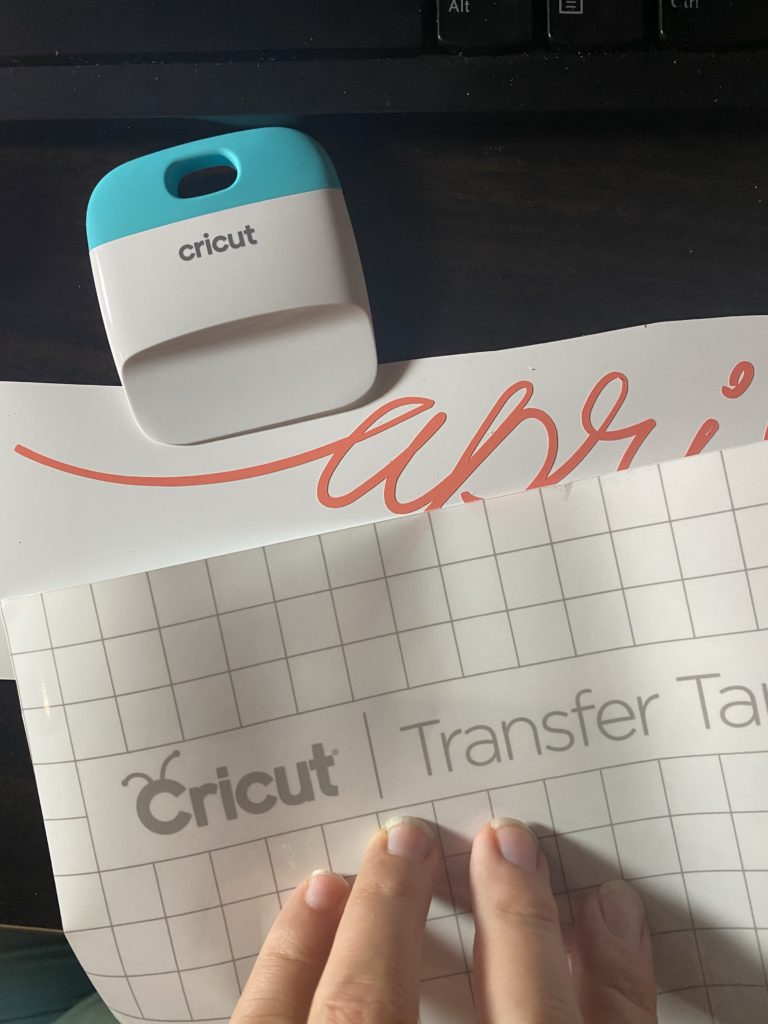
When I found this board I was so excited and I knew I had to have it. The only problem, it didn’t match my decor the way I want it to. Thanks to my new BFF Cricut Joy I have been able to customize it exactly how I want to.
Here’s what you need:
- Pre made blank white board calendar (or any substitute that matches your decor!
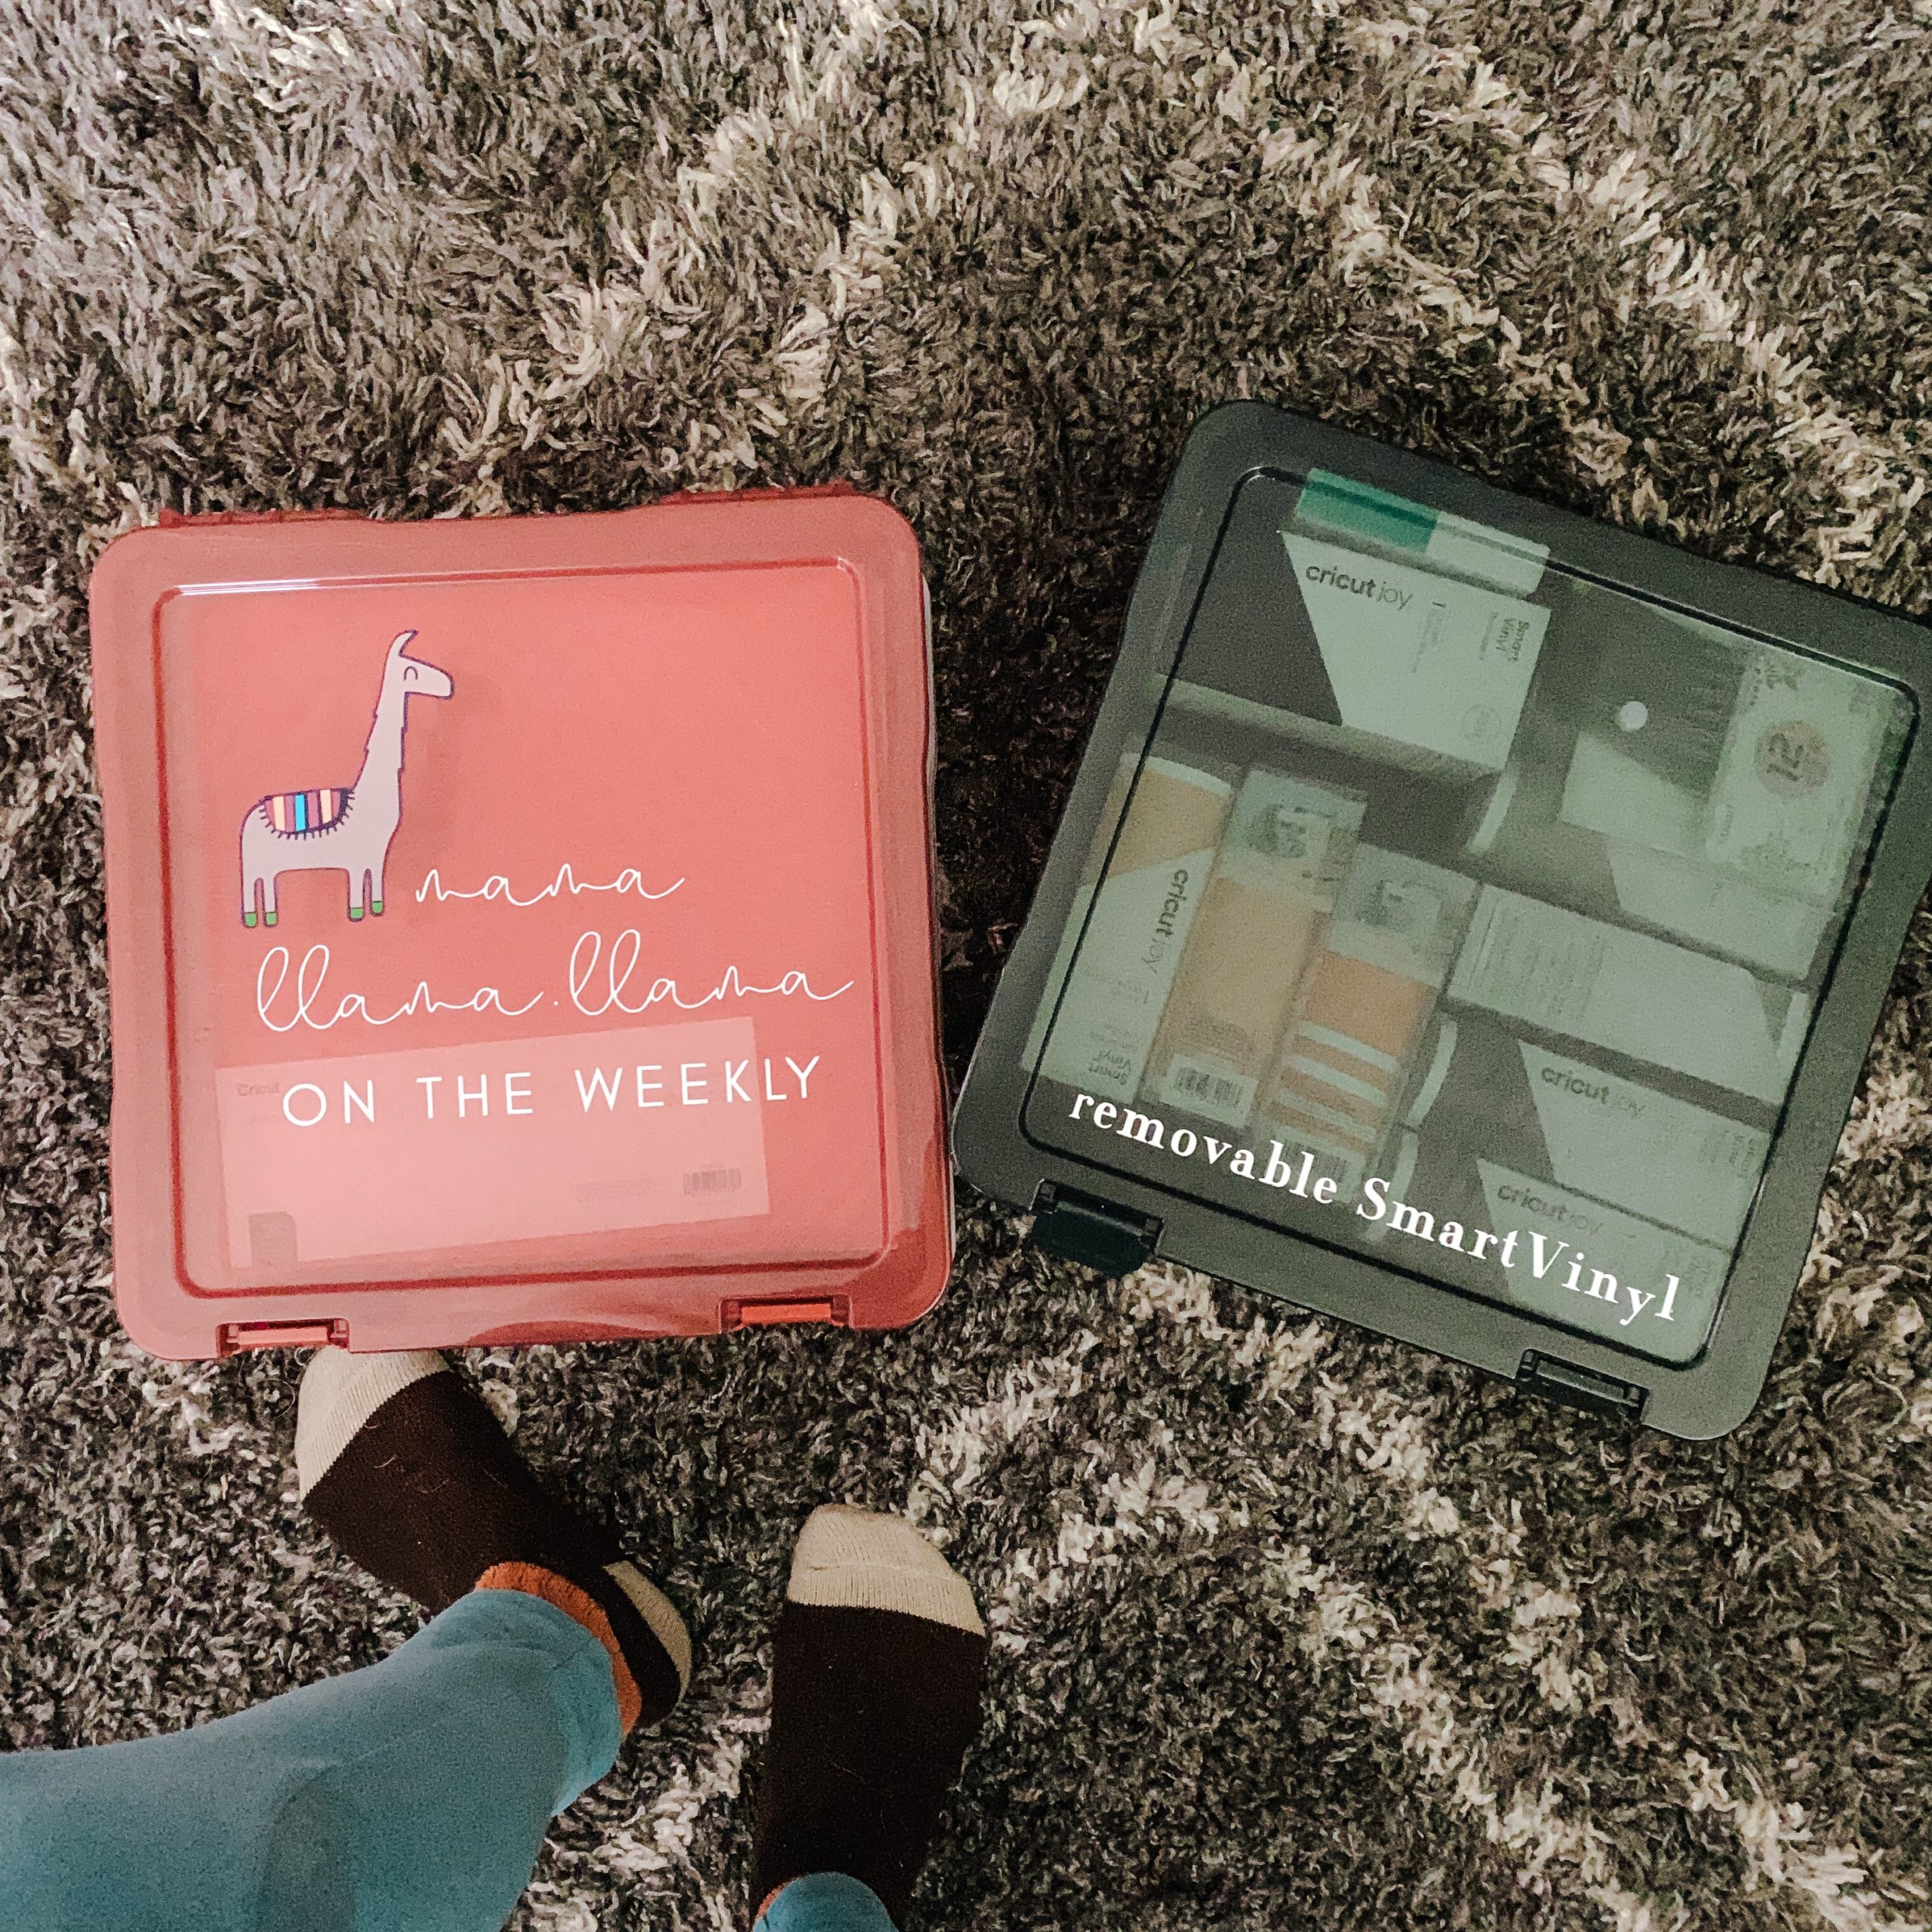
- Cricut Joy or other Machine
- Joy Removable Smart Vinyl, at least 1 color. The more the better
- Design Stupid File: Monthly Calendar-April
- Basic Tool Set
- Transfer Tape
How to:
(Per Cricut Joy Prompts)
- Turn on your Joy and open the Monthly Calendar April file in your Design Space
- Load your SmartVinyl to your Joy and Select “Make it”.
- Select “Without Mat”
- Choose “Removal SmartVinyl”.
- Select Load tools and material and continue with the prompts until project is complete.
- You will have 4 sheets to cut.
- You will have to adjust the size to your board. I do not recommend going any smaller on the numbers or icons
- These are the steps that will be repeated-
- Insert the Knife blade for cutting
- You will be prompted to switch to the colors per sheet for cutting
- Unload material and begin to weed while your others print
- You will have to adjust the size to your board. I do not recommend going any smaller on the numbers or icons
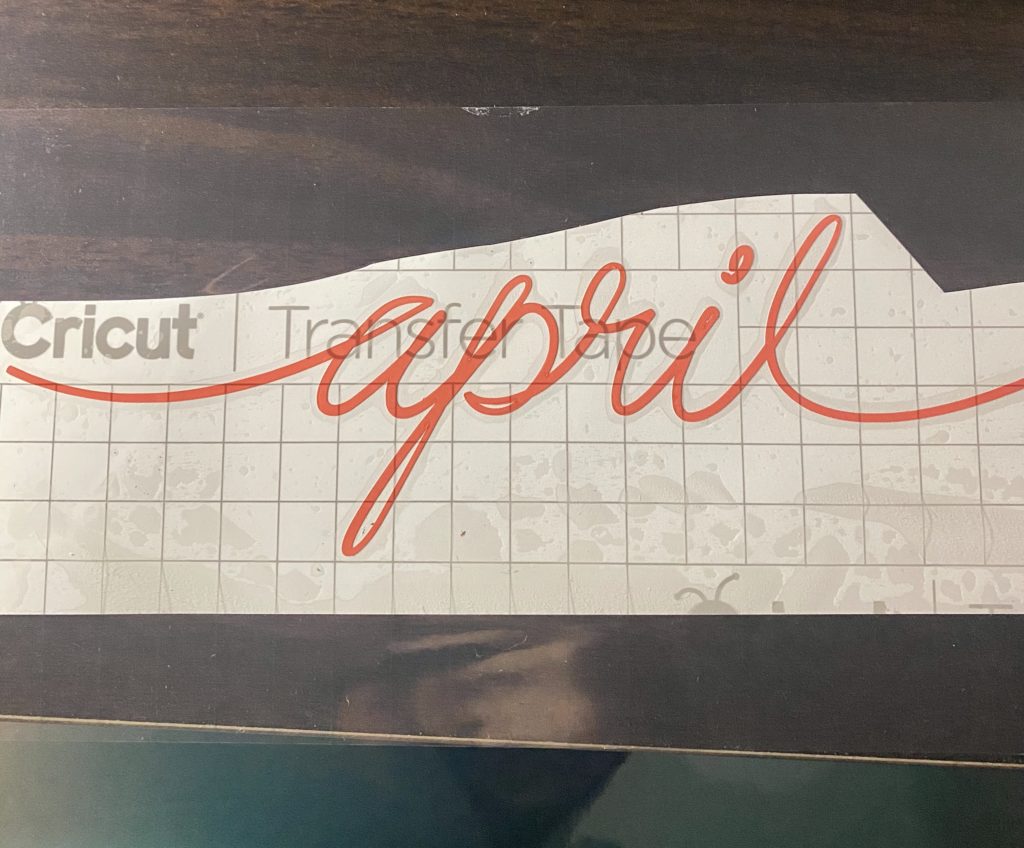
- When you begin to weed you will use your Basic Tool Set. Prepare sheet for Transfer Tape
- Apply Transfer Tap and use scraper to help the vinyl stick.
- Lay your piece where you’d like it to go and press firming with your scraper to apply vinyl (you may want lightly apply at first so that if you need to adjust you can)
- When you are ready to switch months repeat with your precut sheets!
- If you need additional cuts for other months but not all of them simply go into Actions and detach and under layers “hide” what you do not need printed. You can either re attach or leave as is and the machine will fit to paper as needed.
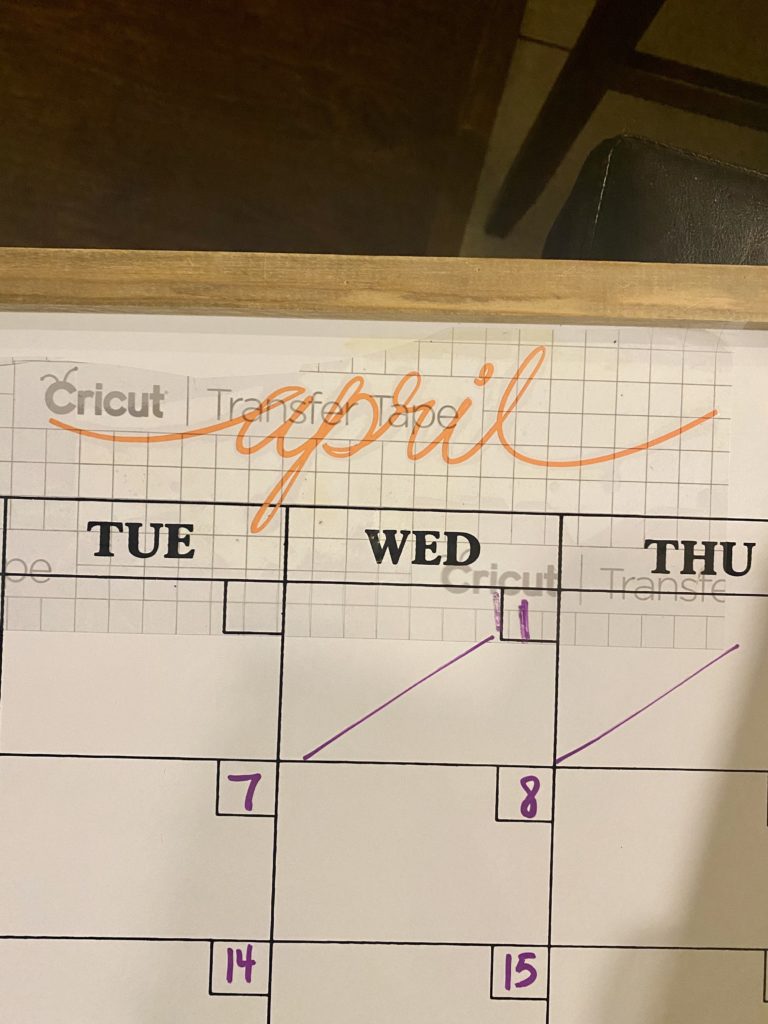
You’ll notice that my board here has a slight change from the final project. That’s because I wasn’t a fan of how small the boxes restricted me I wanted to have the availability to change the dates. Another idea would be to remove the days as well and instead of changing the dates monthly you could rotate the days. For my board I was able to scrape off the black as I’m sure most materials don’t stay on this type of board.
That’s all! You’ll want to change the size to fit your board. If you need any help feel free to reach out!
Looking for some other fun DIY home decor ideas? Head over to these blog to see what they have created!


I need organization in my life!!’ Thanks for the inspo!
This is literally the best! I need to get me a cricut!
Extremely helpful! Thanks for sharing!
This is a great way to organize! And even with no where to go, it just takes a little creativity to fill it up!
I loved this so much I had to steal it and spruce up my own!
I will be trying out for myself, love diy crafts
This is my FAVORITE piece by far
Ohh I love this idea. And same here I’m a thrifty girl missing hunting for the unique items too.
[…] DIY Home Decor […]
I actually have an unused white board! I could totally do this!!
Now I know what to do with my old calendar I have!
Like!! I blog frequently and I really thank you for your content. The article has truly peaked my interest.
Thank you!
Pretty! This has been an extremely wonderful article. Many thanks for supplying this info.
Great article.